
Flooring in the garage
24.11.2023
Garage for storage space of the car, tools and equipment. However, nothing prevents you from changing this room into a safe and efficient diy place without the need to forge a floor and take out debris. The floor in the garage should look nice, easy to clean and be functional. The key to obtaining a durable finish of the floor in the garage is its proper preparation. 
Find out how to quickly and efficiently make a new floor in the garage:
Stage I - Planning
Sketch room dimensions in any graphics program or on a piece of sheet. Draw a view of the room from above and specify the exact dimensions of the floor. Send us a sketch of the room with information about the choice of tile color to the following address: power|powerrubber.com| |power|powerrubber.comStage II – preparation of the garage and laying of tiles
Organize the floor in the garage
The first step is to remove all the items that are on the floor in the garage. The first step is to remove all the items that are on the floor in the garage. Thoroughly clean the entire surface from dirt and dirt by vacuuming it or carefully sweeping it (remember to clean the corners thoroughly).Floor preparation
If the current surface in the garage is concrete or floor spout (screed/screed) – the substrate should be covered with a primer. If there are tiles on the floor, the PVC or concrete liner is covered with old paint or epoxy resin – such a floor does not require strengthening the substrate (priming). Use a quick-drying filler if you notice visible, large cavities in the substrate.Laying tiles
- It is important to first determine the axis of the room from the garage door to the wall, which is parallel to it.
- Laying tiles start with a garage door along the designated axis of the room and from the axis to the external walls.
- Note! The tiles are secured with Fortelock locks. So they do not require any gluing. Be sure to use a rubber hammer when using the tiles together. Always start connecting from the corner of the tile along the castle.
- After completing the installation of entire tiles on the substrate, it is necessary to take care of laying the section at the walls and partitions. Measure the missing fragment thoroughly with a measuring cup and cut the plate with a knife, brushless motor jigsaw or plastic circular saw). Keep peripheral dilatation, that is, 4-5 mm gap (gap) between the plate and the wall of the building.
- The contact of the floor and walls can be finished by making pedestals with a height of 5-10 cm. Use polyurethane glue (PU).
- Important! It is worth using polyurethane glue to glue the first row of tiles, which are mounted along the threshold of the garage door. This is important in case you drive into the garage on the ramp.
Put the tools and equipment back in the garage and you're done!
Tiles in a single-seat garage with standard dimensions of 3x5 m can be arranged by two people in less than an hour.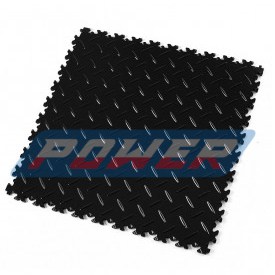 You can buy industrial floors for the workshop here